From time to time we hear of 12 volt coolers power cords melting. In many cases there is a very simple reason for this and it has nothing to do with the cooler cooling mechanism failing. Continue reading “12 Volt Cooler Power Cord Failure and Melting”
Maintenance of 12 Volt Coolers and Portable Mini Refrigerators
Caring for your 12 volt cooler or portable mini refrigerator.
How to clean your 12 volt cooler or portable mini-fridge.
12 volt coolers are electrical devices and should never be submerged in water or any other liquid. When cleaning is required, Continue reading “Maintenance of 12 Volt Coolers and Portable Mini Refrigerators”
How Long Will My Battery Last?
The age old question of “how long will my battery last” is nearly impossible to answer definitively. There are just too many battery variations and environmental variables which all play a part in how long the battery lasts. Continue reading “How Long Will My Battery Last?”
Wire Size Guide Chart
When installing DC powered appliances and accessories it’s important to use the proper size wire. The size of wire required for a given task depends on the voltage being used, the amount of amps required and also the distance that power is being transmitted. Don’t worry, calculating the wire size is made easy with the wire size guides below. We have a chart for 12-volt, 24-volt, 36-volt, 48-volt and 72-volt applications. Wire size by gauge, ampers draw and maximum feet of wire. Continue reading “Wire Size Guide Chart”
Heaters Powered by Your 12-Volt Lighter Socket
Heaters powered by the 12 volt lighter socket or 12 volt accessory outlet in your vehicle can really come in handy when the factory heater stops working. The trouble is that there’s a limited amount of power available from the lighter socket in any vehicle. Everybody knows that it takes a good amount of power (AC or DC) to generate a reasonable amount of heat. This is of course why most homes don’t use electric heat. Continue reading “Heaters Powered by Your 12-Volt Lighter Socket”
12Volt TV Audio Quality & Settings
If you’ve purchased a new 12-volt television for your truck or RV and are having trouble with the audio there are a few simple steps that can help clear things up a bit.
Some folks don’t care for the factory audio settings on new TV’s. The description of the audio symptoms are normally “sounds like the TV’s in a tin can” or “volume isn’t quite loud enough”.
To resolve these issues using the TV remote control, Continue reading “12Volt TV Audio Quality & Settings”
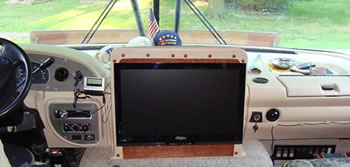
A Jensen 12 Volt RV TV Nicely Replaces The Original Doghouse TV
Replacing an old RV TV may be easier and less expensive than you might have anticipated.  Since the 12 volt CRT television has for the most part gone away, the first thing you should consider is how to mount a new Flat Screen 12 Volt TV.
Though wall mounting a flat screen RV TV in your motorhome is not necessary, it is highly recommended that you do so that the TV is properly secured.
Installing a new television in the doghouse location is fairly easy and can usually be completed in just a couple of hours. This is carried out by first removing the original television.
RV TV Wallmounts | Jensen RV TV’s
Continue reading “A Jensen 12 Volt RV TV Nicely Replaces The Original Doghouse TV”
How To Add a 12V Outlet
Adding a 12V outlet to your vehicle for powering 12V accessories is fairly simple and can normally be carried out in just an hour or so. The tools and the amount of time required depends on how and where the 12V outlet is installed. Continue reading “How To Add a 12V Outlet”
LED Lights ~ Wiring
Using Automotive LED Lights is a bit different than using incandescent automotive bulbs. You can expect the wire colors and power consumption to be a bit of a surprise. Being that LED lights use far less power than standard automotive bulbs, if you plan to install LED lights as blinkers/turn signals, you should Continue reading “LED Lights ~ Wiring”
Solar Battery Maintainer ~ Mounting & Operating the SP-200
Assembly and mounting instructions.
Remove all cords wraps and uncoil the cables prior to using the solar battery maintainer.
To mount the solar battery maintainer (in a dry location off the ground):
• Using the solar panel as a template (guide), mark the location of the four pre-molded mounting holes on a secure, flat surface.
• If necessary, drill four 7/64” (0.109) dia. Pilot holes.
• Mount the solar panel using the four stainless steel screws provided.
Continue reading “Solar Battery Maintainer ~ Mounting & Operating the SP-200”

